Continue to Site

Welcome to EDAboard.com

Welcome to our site! EDAboard.com is an international Electronics Discussion Forum focused on EDA software, circuits, schematics, books, theory, papers, asic, pld, 8051, DSP, Network, RF, Analog Design, PCB, Service Manuals... and a whole lot more! To participate you need to register. Registration is free. Click here to register now.

People counter sketch with Arduino

Status
Not open for further replies.
the dyty cycle is given_value/1024

512/1024=0.5 which equals 50%

if you use 256/1024=0.25 you will get 25% duty

Alex
 
Cheers for that BigDog and Alex!

Can anyone help me with Timer1 in my sketch above?
 

One idea for the led blinking would be to use a timer interrupt on compare match.
Depending on the timer frequency you can calculate the timer counts that represent that delay.

Suppose that you have a timer that runs at 16MHz/8= 2000000Hz
the resolution will be 1/2000000=0.5us

To get an output toggling at 38KHz you have to toggle the output every 13us (resulting in 38.46KHz) and this represents 26 count of the timer so

set the timer to get an interrupt on compare match and the output A to toggle and set the initial compare match A value to 120 so that it represents the 60us delay

then inside the interrupt

if (OCR1A>=406) { TCNT1=0; OCR1A=120;}
else if (OCR1A>=120) OCR1A+=26;

these are the used values and the output
Code:
next	       count	      output
		120		1
+26		146		0
+26		172		1
+26		198		0
+26		224		1
+26		250		0
+26		276		1
+26		302		0
+26		328		1
+26		354		0
+26		380		1
		406		0
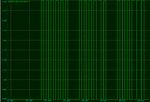
This is the result of that
infrared.gif

Alex
 

The spacing between bursts is too small. According to the datasheet,
• After each burst which is between 6 cycles and 70 cycles a gap time of at least 10 cycles is necessary.

John


Hey John,
I've been thinking about my setup... Considering that the IR rec. output's a low whenever it gets a cycle of 38kHz, and that it cannot be held continuously low, won't I have trouble detecting when a count actually occurs? Because if the IR rec. will be outputting a HIGH every 6-70 cycles, then won't a count be recorded every 6-70 cycles?

---------- Post added at 18:03 ---------- Previous post was at 17:57 ----------

One idea for the led blinking would be to use a timer interrupt on compare match.
Depending on the timer frequency you can calculate the timer counts that represent that delay.

Alex

That's what I'm after Alex. Thank you!! I understand the logic of it, however I don't understand the code :(
I don't know how to implement this into my sketch:( I apologise for my lack of experience.

Can you point me to a tutorial which would show me, or show me yourself, how I would use
if (OCR1A>=406) { TCNT1=0; OCR1A=120;}
else if (OCR1A>=120) OCR1A+=26;
in my sketch?

---------- Post added at 18:13 ---------- Previous post was at 18:03 ----------

I know how to say my sketch in english....

/* when timer count reaches 0 {turn on PWM sketch;}
turn off PWM sketch after x cycles;
at the end of PWM sketch, restart timer (restart cycle); */
 

That's what I'm after Alex. Thank you!! I understand the logic of it, however I don't understand the code :(
I don't know how to implement this into my sketch:( I apologise for my lack of experience.

Can you point me to a tutorial which would show me, or show me yourself, how I would use in my sketch?

---------- Post added at 18:13 ---------- Previous post was at 18:03 ----------

I know how to say my sketch in english....

/* when timer count reaches 0 {turn on PWM sketch;}
turn off PWM sketch after x cycles;
at the end of PWM sketch, restart timer (restart cycle); */

Actually I'm not using PWM, the timer works in normal mode.
I just use the compare match functionality of the timer to toggle the output on compare match and change the compare match register value content to the next value.
In a compiler like gcc (winAVR) this is as simple as

Code:
// Timer/Counter 1 initialization
// Clock source: System Clock
// Clock value: 2000,000 kHz
// Mode: Normal top=FFFFh
// OC1A output: Toggle
// OC1B output: Discon.
// Noise Canceler: Off
// Input Capture on Falling Edge
// Timer 1 Overflow Interrupt: Off
// Input Capture Interrupt: Off
// Compare A Match Interrupt: On
// Compare B Match Interrupt: Off
OCR1AL=0x78;
OCR1AH=0x00;
TCCR1A=0x40;
TCCR1B=0x02;
TCNT1H=0x00;
TCNT1L=0x00;
ICR1H=0x00;
ICR1L=0x00;
OCR1BH=0x00;
OCR1BL=0x00;

// and then inside the compare matchA interrupt
if (OCR1A>=406) { TCNT1=0; OCR1A=120;}
else if (OCR1A>=120) OCR1A+=26;

The problem is that I have no idea of what you can do with arduino and if you can write code in that level or if you can only use the provided arduino lib functions.

Alex

P.S. you also have to change the COMP1A pin as output
 
Hey John,
I've been thinking about my setup... Considering that the IR rec. output's a low whenever it gets a cycle of 38kHz, and that it cannot be held continuously low, won't I have trouble detecting when a count actually occurs? Because if the IR rec. will be outputting a HIGH every 6-70 cycles, then won't a count be recorded every 6-70 cycles?/

That would depend on your software. I don't see it as an impediment though.

I see three levels in this project not including the actual construction:

First is the definition of the problem. "People counter" is actually quite vague. Are you trying to count people milling around in a field or passing through a gate? How are you going to ensure single file for your beam-break method? What about babies being carried or in strollers, and so forth. Most important, what are the implications of an incorrect count? Is this just to get a rough estimate or will it be used to determine when everyone has exited an area so the doors can be locked. The latter is just an example to illustrate that people counting can be critical.

Second is a flow chart of what you want to do. What I presented was not intended to be exact, but only as an example. Many programs include flow-charting utilities, such as Excel and PowerPoint. I recently found a stand alone called LucidChart, which is available free for limited users and it seems quite easy and intuitive to use. You do have to register, but so far I have not been buried in spam: https://www.lucidchart.com/

Third you need to write the program. Flashing an LED or IRED is a standard exercise in most programming tutorials, but your program will include much more than that, depending on what you decide to do in step two.

I think the first step should be performed first. If I were grading an assignment for a "people counter," and the student turned in a "beam-break counter," he would not get a very good grade from me. However, if you simply want a beam-break detector, then let's proceed in that direction.

Learning how to program and developing a flow chart can be concurrent activities, but trying to get a finished program without completing the second step is getting the cart before the horse. Again, I would recommend using the scheme shown in Figure 3 of the datasheet. After you get something working, then you can modify the 38 KHz carrier on/off spacings to improve it (if needed). I suspect that wouldn't be needed. Trying to improve on a system to get quicker detection before getting the basic system to work can lead to lots of frustration.

Now, to your specific question: When the beam is interrupted, the receiver output goes high. The MCU will expect another low after a defined period depending on how the modulation is set up (see Figures 1 and 3 of the datasheet). When that "low" is not detected, then a count will be registered. Another count will not be registered until a low-high sequence is repeated and another missing peak (i.e., low in this case) is detected. If you think about it is broad terms, that is similar to how the TSOP341... works too.

John
 
How are you going to ensure single file for your beam-break method?
I am counting the number of people who use a bike path.. so they file up for me :)

Second is a flow chart of what you want to do

I spend time doing little flow charts on a pad of paper. They're pretty useful :)

After you get something working, then you can modify the 38 KHz carrier on/off spacings to improve it (if needed). I suspect that wouldn't be needed. Trying to improve on a system to get quicker detection before getting the basic system to work can lead to lots of frustration.

That's what I'm concerned about. I'm sure that there is a way to filter out the HIGH's which my arduino (the microcontroller I'm using to run my program) will be receiving and only output when it reads a HIGH for x microseconds.... I just have to find that way.

Thanks so much for all your help John. You've put a lot of thought into my project.


The problem is that I have no idea of what you can do with arduino and if you can write code in that level or if you can only use the provided arduino lib functions.

I just tried to use your code with the arduino. It didn't work unfortunately :(
Also, what is this compare-match you keep talking of?

Here is the code I wrote to fulfil my needs... it doesn't work perfectly. Maybe, Alex, you or someone else could tell me what's wrong with it?

Code:
#include <TimerOne.h>

unsigned long now;
unsigned long then = 0;
unsigned long interval = 2500000;
unsigned long pwminterval = 5000000;

void setup(){
  pinMode(9, OUTPUT);
  Timer1.initialize();
  digitalWrite(13,HIGH);

}

void loop(){
  now = micros(); //variable to store the read value
  if (now - then > interval){
    Timer1.pwm(9,512,100000);}
  if (now - then > pwminterval){
    digitalWrite(9,LOW);
    then = now;
    }
    
}
 

Arduino is designed so that it hides some of the complexity of mcu programming from the user by using many higher level functions, unfortunately this advantage is at the same time a disadvantage because you don't have full control of all aspects of the mcu.
You can always write lower level code but I don't know if the result of mixing these two ways will be the proper ones.
I haven't used arduino so I can't help much.

The compare match feature is described in the datasheet, section 16.7-16.8 page 116 (for timer1) http://www.atmel.com/dyn/resources/prod_documents/doc2545.pdf

It is essentially a register (there are two available in the timer) that is loaded with a custom user value , when this value matches the value of the timer counter then depending on the settings you can get an interrupt and/or toggle/set/reset the compare output pin.
I'm using interrupt and toggle output, the output changes automatically and I use the interrupt to set the next match value.

Alex
 

It is essentially a register (there are two available in the timer) that is loaded with a custom user value , when this value matches the value of the timer counter then depending on the settings you can get an interrupt and/or toggle/set/reset the compare output pin.
I'm using interrupt and toggle output, the output changes automatically and I use the interrupt to set the next match value.

That's very interesting Alex! Thank you :)

Can you see what is wrong with my above sketch?
 

According to the arduino tutorial
micros() returns the number of microseconds since the Arduino board began running the current program

I don't think you can get the accuracy that you want using this way but assuming that Timer1.pwm(9,512,100000); works as intended , shouldn't you turn this off when you want to stop the PWM?
You are currently setting the timer to give PWM and then when you want to get a pause you write a 0 to the output, it can't work this way.

Alex
 

I have made a sketch which works!!!!! Atleast it appears to.

What do you think?

Code:
/* People counter sketch baby!
 */

// constants won't change. Used here to 
// set pin numbers:
const int ledPin =  9;      // the number of the LED pin

// Variables will change:
int ledState = LOW;             // ledState used to set the LED
long previousMicros = 0;        // will store last time LED was updated
long then = 0; //stores value of now when it was last updated

// the follow variables is a long because the time, measured in miliseconds,
// will quickly become a bigger number than can be stored in an int.
long interval = 13 ;           // interval at which to blink (microseconds)
long pause = 520; // pause between pulsing
long pausepulse = 2080; //time from beginning of pause till end of pulsing

void setup() {
  // set the digital pin as output:
  pinMode(ledPin, OUTPUT);      
}

void loop()
{
  // here is where you'd put code that needs to be running all the time.

  // check to see if it's time to blink the LED; that is, if the 
  // difference between the current time and last time you blinked 
  // the LED is bigger than the interval at which you want to 
  // blink the LED.
  long now = micros();
  
  if (now - then >= pause && now - then <= pausepulse){
    unsigned long currentMicros = micros();
 
    if(currentMicros - previousMicros > interval) {
    // save the last time you blinked the LED 
    previousMicros = currentMicros;   

    // if the LED is off turn it on and vice-versa:
    if (ledState == LOW)
      ledState = HIGH;
    else
      ledState = LOW;

    // set the LED with the ledState of the variable:
    digitalWrite(ledPin, ledState);
    }}
  if (now - then >= pausepulse){
    then = now;}
  
  }
 

Status
Not open for further replies.

Similar threads

Part and Inventory Search

Welcome to EDABoard.com

Sponsor

Back
Top