junly
Newbie level 3

In this article, I'll try to send an SMS with my PIC16F628A.
Requirements
To get the most out of this article, you'll need the following:
Introduction
When the SIM900A module is powered up, a lot of things are going on. One of them are that the module is trying to get registered to a network. When it is successfully registered to a network, we can send SMS, receive SMS and get the service providers name. The main goal for this article is to send an SMS to a predefined number. To get the service providers name is a bonus.
The module communicates with the surrounding circuitry with TTL or with the onboard MAX232 IC. I'll be using the MAX232 interface. This means that all communication is done with the PICs UART, and all our commands from the PIC will be sent to the UART port with printf.
Hardware
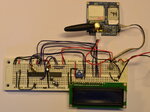
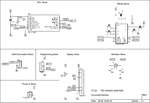
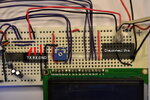
I've connected my breadboard like this:
Since I'm using an MAX232, I can use that to see and troubleshoot what the microcontroller is sending to the GSM module. To do this, I disconnect the GSM module, and connect my serial cable, and open up GtkTerm. Baud setting: 9600-8-N-1.
This is what the microcontroller is sending to the GSM module. The first three lines are only to verify that serial communication is working and to see what I'm sending. The last two lines are instructions to the GSM module.
Partlist
This is a screenshot of the bom.ulp from EagleCAD.
Software
Although the software is commented, I'll go through some parts of it here. When the PIC is powered up, a short welcome message is displayed. Then a 15-second countdown starts. I've put in this countdown, for two reasons:
1.Allow the GSM module to get registered.[/LIST]
2.A visual display which shows the user that something is happening and the PIC is working.
When the countdown is finished, the PIC sends the command:
It is important to add Carriage return – New line, the \r\n. This tells the module to execute the text string that has arrived in the modules buffer.
The module then returns the string:
This means that the module is registered to NetCom. NetCom is the service provider's name. It's this name we want to display on the LCD. Now we need to extract the name from the string. The way I do that, is to read the whole string into an array. Then I'll search for the “-signs". When the “-signs" are found, I store their position in another array. This is what I call "start and stop". Then I use the values from "start and stop" to display the characters in between on the LCD. Perhaps not the fanciest way of doing it, but it is simple.

To send the SMS I have to send some more AT commands.
First, I send the command:
This is the Select SMS Message format. The 1 tells the module to go into text mode.
Second, I send the command:
“receiver” is the number I want to send a message to.
Third, I send the command:
This is the actual message. Since the message has multiple characters, including spaces, there's a nifty way to tell the module where the end of the message is. I have to send the EOF sign, which happens to be CTRL-Z.
This is the EOF character in the regular ASCII table. The module will now send the message.
Use this link to find documents regarding the SIM900A module.
Thanks for reading!
Requirements
To get the most out of this article, you'll need the following:
- SIMCOM SIM900A module, upgraded to be able to get registered to a European service provider.
- A computer running MPLAB X, and the XC8 compiler.
- A PIC16F628A and an MAX232.
- A way to program your PIC, I'm using a PICkit 3.
- Breadboard, jumperwires, and an LCD.
- Parts from the parts list.
Introduction
When the SIM900A module is powered up, a lot of things are going on. One of them are that the module is trying to get registered to a network. When it is successfully registered to a network, we can send SMS, receive SMS and get the service providers name. The main goal for this article is to send an SMS to a predefined number. To get the service providers name is a bonus.
The module communicates with the surrounding circuitry with TTL or with the onboard MAX232 IC. I'll be using the MAX232 interface. This means that all communication is done with the PICs UART, and all our commands from the PIC will be sent to the UART port with printf.
Hardware
I've connected my breadboard like this:
Since I'm using an MAX232, I can use that to see and troubleshoot what the microcontroller is sending to the GSM module. To do this, I disconnect the GSM module, and connect my serial cable, and open up GtkTerm. Baud setting: 9600-8-N-1.
This is what the microcontroller is sending to the GSM module. The first three lines are only to verify that serial communication is working and to see what I'm sending. The last two lines are instructions to the GSM module.
Partlist
This is a screenshot of the bom.ulp from EagleCAD.
Software
Although the software is commented, I'll go through some parts of it here. When the PIC is powered up, a short welcome message is displayed. Then a 15-second countdown starts. I've put in this countdown, for two reasons:
1.Allow the GSM module to get registered.[/LIST]
2.A visual display which shows the user that something is happening and the PIC is working.
When the countdown is finished, the PIC sends the command:
Code:
AT+CPOL?\r\nIt is important to add Carriage return – New line, the \r\n. This tells the module to execute the text string that has arrived in the modules buffer.
The module then returns the string:
Code:
+CPOL: 1,0,” N NetCom”,1,0,1This means that the module is registered to NetCom. NetCom is the service provider's name. It's this name we want to display on the LCD. Now we need to extract the name from the string. The way I do that, is to read the whole string into an array. Then I'll search for the “-signs". When the “-signs" are found, I store their position in another array. This is what I call "start and stop". Then I use the values from "start and stop" to display the characters in between on the LCD. Perhaps not the fanciest way of doing it, but it is simple.
To send the SMS I have to send some more AT commands.
First, I send the command:
Code:
AT+CMGF=1\r\nThis is the Select SMS Message format. The 1 tells the module to go into text mode.
Second, I send the command:
Code:
AT+CMGS=”receiver”\r\n“receiver” is the number I want to send a message to.
Third, I send the command:
Code:
Message from PIC16F628A\r\nThis is the actual message. Since the message has multiple characters, including spaces, there's a nifty way to tell the module where the end of the message is. I have to send the EOF sign, which happens to be CTRL-Z.
Code:
printf(“%c”,26);This is the EOF character in the regular ASCII table. The module will now send the message.
Use this link to find documents regarding the SIM900A module.
Thanks for reading!


