Vermes
Advanced Member level 4

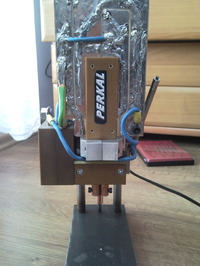
This welding machine can weld cells such as NiCd, NiMH Lithium and other. It is much cheaper solution to make the device yourself than to order welding service from a company.
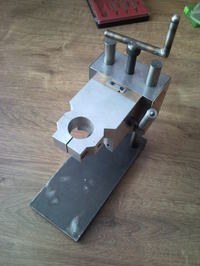
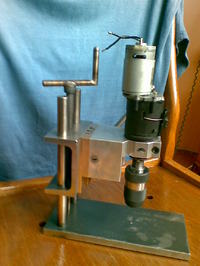
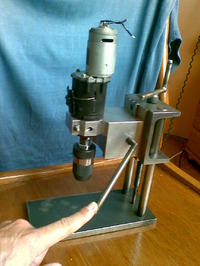
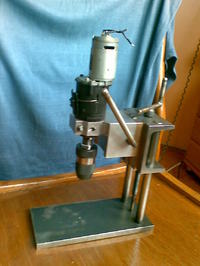
Drill stand (also DIY) was used in the construction:
Basic elements of the welding machine are: thyristor, capacitors, copper electrodes and power supply.
Thyristor:
In the initial version it was a TK 1202 K, but after few tens of weldings it shorted. So it was replaced with a much larger and more powerful coin-cell thyristor T 987-630-12 with current of 630A. A housing needed to be created for that thyristor:
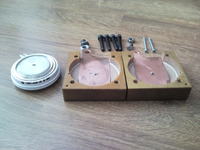
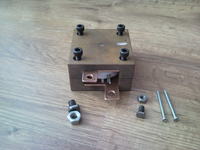
Another element consists of 10 capacitors 33000uF 35V, connected in parallel on one board.
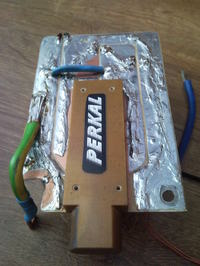
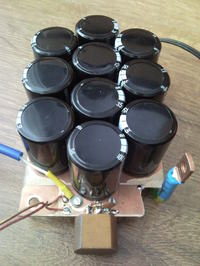
It is important to strengthen paths by tin (or a wire), because they do not last currents that flow there. Under the capacitors, you can see resistors and 100n capacitor which controls the gate of the thyristor.
Another element – electrodes:
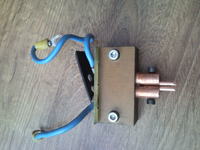
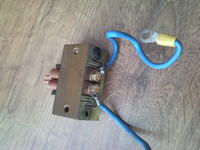
In this case they are two copper bars with diameter of 10mm, from the top with threaded holes for screwing cables, from the bottom with holes 3,6mm for mounting electrodes of 3,5mm copper wire sharpened on three sides so that the peaks are close to each other. The bars on the side are milled so they have a little bit of surface which prevents from rotating and there is a laminate plate as an insulator between them.
Initially, the bars were screwed to the laminate plate from the top. The laminate plate was cut so that it could be used as a spring, but it turned out not to be such a good idea. It is better to use ordinary springs above electrodes. In this project, there are holes for springs in the screws which mount the cables. The electrodes peaks have approximately 0,8 x 0,8mm.
Assembled device looks like that:

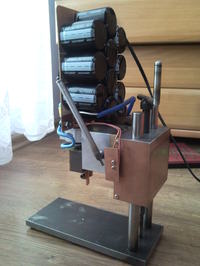
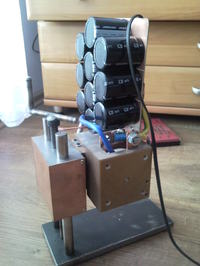
In the lowering lever of the stand there is a button that turns on the welding machine's shot through the switch screwed on the side of the machine.
And the last element is the power supply:
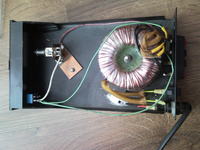
It is a part of a satellite positioner. 24V transformer, bridge of diodes, bulb which is the current limitation during loading as well as the loading control and element for discharging the capacitors.
Now the simple scheme:
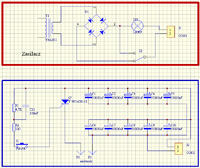
The switch in the power supply causes discharge of the capacitors after finished work and before disconnecting. Capacitors load up to 36V and during the first phase of loading the bulb in the power supply 24V 55W lights slowly fading. It also lights after the shot and during the short of electrodes it protects the power supply. Loading the capacitors starts after detaching the welding element from the electrodes.
Link to original thread (useful attachment) – Zgrzewarka do ogniw NiCd, NiMH Litowych i innych