Continue to Site

Welcome to EDAboard.com

Welcome to our site! EDAboard.com is an international Electronics Discussion Forum focused on EDA software, circuits, schematics, books, theory, papers, asic, pld, 8051, DSP, Network, RF, Analog Design, PCB, Service Manuals... and a whole lot more! To participate you need to register. Registration is free. Click here to register now.

MOC3020/BTA41 circuit problem

Status
Not open for further replies.

abuhafss

Full Member level 2
Full Member level 2
Joined
Aug 8, 2010
Messages
142
Helped
1
Reputation
2
Reaction score
0
Trophy points
1,296
Activity points
2,383
Hi

Recently working on an Arduino based AC heater controller, I have been facing some unusual problems with MOC3020 and triacs BTA136 or BTA41.

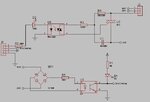
Attached, please find the schematic and the completed PCB.

Initially, for testing, I connected an incandescent bulb across heater terminals and connected the FIRE pin to 5V. The bulb lit fine.

At a later stage, the bulb stopped working. I replaced the triac, nothing improved. Shorting the pins 4 & 6 of optocoupler lit the bulb. I replaced MOC3020 but still the problem is there.

Now, when I switch on 220VAC with FIRE pin already connected to 5V, the bulb would lit for a fraction of second and then go off. Same happens when I switch off 220VAC.

I shall appreciate suggestions for troubleshooting the module.
 

Attachments

  • 2019-12-10.png
    2019-12-10.png
    17 KB · Views: 653
  • 20191210_184533.jpg
    20191210_184533.jpg
    343.1 KB · Views: 374

Two points:
R4 value looks too low, it is only there to ensure the gate has some leakage current when the output of the MOC3020 is high impedance, I suggest a value of 2.2K or higher. Remember that when the MOC is 'off' no current flows through it so t dissipates no power and when the MOC is 'on' T2 clamps the voltage across MT1 and MT2 so again the current is quite low.

The MOC3020 LED may not be driven with enough current. The Arduino output will be a little less than 5V when high, the MOC needs as much as 1.5V and your LED1 will drop at least 1.6V so the current will not be higher than (5 - 1.5 - 1.6)/100 = 19mA but probably less. Consider wiring LED1 and the MOC LED n parallel, each with it own series resistor and using a transistor as a current switch.

Brian.
 

Thanks Brian, for your input.

I will follow your first point and see if the things improve.

For the second point, I would say that I have seen many circuits with similar design. Just for your reference, see below a ready-made compact module from China. Even it has an LED for zero-crossing with a 10K pull-up resistor, which I doubt would glow or not. Nevertheless, I will consider your second tip too.

Besides, what do you say about the network around the triac in the Chinese module? Is it better than my design?
 

Attachments

  • 1_Channel_Triac_Module.jpg
    1_Channel_Triac_Module.jpg
    281.3 KB · Views: 897
  • arduino_triac_module.jpg
    arduino_triac_module.jpg
    39.3 KB · Views: 833

Note the different resistor arrangement around the triac! The Chinese design uses a capacitor to filter noise from the gate and to partially snub spikes from across the line. For driving a heater which is mostly resistive, the capacitor isn't essential but I would guess it is marketed for switching reactive loads too. You really don't want a 330 Ohm resistor sinking the gate current away.

My point about the LED in series with the MOC3020 is there isn't much headroom if, for example, a high brightness LED is used. An indicator type with Vf of ~1.6V will work but one with higher Vf probably wont. Most high brightness LEDs have a Vf of more than 3V and given that the Arduino output voltage will drop under load, there may not be enough current to turn the MOC on.

I would use the zero crossing detector in your original schematic. They work the same but consider the bridge rectifier has to be rated at more than 2 x peak AC RMS voltage in the Chinese design but only at about 3V if the resistor are on the AC side. You can use small signal diodes instead of big high voltage ones.

I agree the zero crossing LED will be very dim in the Chinese design and it also limits the voltage at the output to supply - Vf.

Brian.
 
I would use the zero crossing detector in your original schematic. They work the same but consider the bridge rectifier has to be rated at more than 2 x peak AC RMS voltage in the Chinese design but only at about 3V if the resistor are on the AC side. You can use small signal diodes instead of big high voltage ones.

I cannot follow you here, are you suggesting to use a bridge rectifier chip or you want me to replace the 1N4007s with smaller diodes like 1N4148?

By the way, the zero-crossing detection is working fine in my circuit. I suspect something fishy going on around my MOC3020 and the triac. I will remove R4 (330 Ohms) and see if the circuit works.
 

I
cannot follow you here, are you suggesting to use a bridge rectifier chip or you want me to replace the 1N4007s with smaller diodes like 1N4148?
If the bridge rectifier is directly across the AC it has to bear the full AC voltage, if you place the resistor before the bridge it only has to handle a low voltage. The maximum voltage it can have across it is the optocoupler LED voltage plus the drop of the bridge itself, probably around 3V in total. So instead of using high voltage diodes, you can use 1N4148 or equivalents.

It is a good idea to use two resistors in series instead of one. The reason is the resistor drops most of the AC line voltage and small resistors are only rated to relatively low voltages, usually around 200V. They can both be in one side of the AC or one in each side, electrically it makes no difference but I prefer one in each side for safety as it limits the current if the bridge gets touched, regardless of which way around the AC is connected. I'm not sure where in the World you are but here we have 240V line voltage and two 47K resistors works well.

Brian.
 

Hi,

In the link they talk about a three phase system, where the load connection is delta wired.

So do you have a three phase system?
And is your load delta wired?

******

Zero cross there is not when the line_to_neutral voltage is zero.
All three phases have 120° phase shifted timing.

But in this case if you want zero cross switching you need
* focus on the difference voltage of two phases, then switch ON the according two switches.
* then check for zerocross across the switch of the third phase to get it's switch ON timing.

Or:
* You may switch ON one single phase at random time (= no current flow)
* And switch ON the other phases at their according zero cross

Klaus
 

Note the different resistor arrangement around the triac! The Chinese design uses a capacitor to filter noise from the gate and to partially snub spikes from across the line. For driving a heater which is mostly resistive, the capacitor isn't essential but I would guess it is marketed for switching reactive loads too. You really don't want a 330 Ohm resistor sinking the gate current away.

My point about the LED in series with the MOC3020 is there isn't much headroom if, for example, a high brightness LED is used. An indicator type with Vf of ~1.6V will work but one with higher Vf probably wont. Most high brightness LEDs have a Vf of more than 3V and given that the Arduino output voltage will drop under load, there may not be enough current to turn the MOC on.

I removed the 330 Ohms resistor and replaced 220 Ohms with 1K/1W => Nothing improved.
Then I shorted the legs of the LED => Now the triac is performing fine with external triggering though not working with Arduino. I will debug the code to see if it works.

Thank you very much for your precious tips.
 

Hi,

In the link they talk about a three phase system, where the load connection is delta wired.

So do you have a three phase system?
And is your load delta wired?

******

Zero cross there is not when the line_to_neutral voltage is zero.
All three phases have 120° phase shifted timing.

But in this case if you want zero cross switching you need
* focus on the difference voltage of two phases, then switch ON the according two switches.
* then check for zerocross across the switch of the third phase to get it's switch ON timing.

Or:
* You may switch ON one single phase at random time (= no current flow)
* And switch ON the other phases at their according zero cross

Klaus


Dear Sir Klaus,


Yes, my system is 3-phase , but "Two Leg SCR Power Control" type, consider only TRIAC here instead of 2 parallel SCR.
2_leg_3p.PNG

I am trying to use TRIAC because it conducts both side of current.

Not sure what you are trying to say, but if it goes behind theory, let me know.

Consider my PF currection capacitor bank.
 

Hasan, please start a new thread with your questions as these are not the same as the ones Abuhafss is posting.

Then I shorted the legs of the LED => Now the triac is performing fine with external triggering though not working with Arduino. I will debug the code to see if it works.
If shorting LED1 makes it work it means I was right about not having enough current available from your Arduino. I would suggest you try what I suggested earlier, use a transistor to drive the MOC and LED in parallel. When current is drawn from a logic output on an Arduino the voltage drops quite a lot, it will not be the 5V you expect. Combined with the LED voltage drop it probably isn't sufficient to turn the MOC on reliably.

Use a small NPN transistor, connect its emitter to ground, connect the base through a 4K7 resistor to the Arduino and connect the collector to two resistors, a 1K to the cathode of the LED and 470R to the cathode (pin 2) of the MOC3020. Connect pin 1 and the anode of the LED to +5V. This will place less load on the Arduino and also allow more current to the LED and MOC3020.

Brian.
 

Status
Not open for further replies.

Part and Inventory Search

Welcome to EDABoard.com

Sponsor

Back
Top