Continue to Site

Welcome to EDAboard.com

Welcome to our site! EDAboard.com is an international Electronics Discussion Forum focused on EDA software, circuits, schematics, books, theory, papers, asic, pld, 8051, DSP, Network, RF, Analog Design, PCB, Service Manuals... and a whole lot more! To participate you need to register. Registration is free. Click here to register now.

General electronic troubleshoot.

Status
Not open for further replies.

ron-e-g

Junior Member level 1
Joined
Jul 25, 2018
Messages
15
Helped
0
Reputation
0
Reaction score
0
Trophy points
1
Activity points
123
Hello,

I'm by no means an electronic ..anything. I live in a rural area so finding someone who has knowledge to hire to help me has been futile. Our church has a gymnasium, and small school attached. The gym has/had a Minuteman 320 walk behind floor scrubber. The motor for the vacuum system has not worked since I came on board as a sort of maintenance man/ carpenter six years ago. All other motors/ functions work. I replaced the motor with used (supposedly working one) from ebay. It still does not work. I have the electrical schematics, but don't know the first thing about how to test a 36 volt DC system with a Radio shack true RMS 42 DVM. If I only knew how I could probably test both wires back to their source to see where the current stops? maybe? The motor has two wires both white.

Any help would be greatly appreciated.

Ron
 

Attachments

  • 36 volt motor.JPG
    36 volt motor.JPG
    239.5 KB · Views: 199
Last edited:

Okay, since you can assume the motor is good, the problem is upstream. There's a terminal block near the motor, you should see voltage there. Check the 'contactor for vacuum motor', that's basically a relay that needs to be energized. If it's not you might be able to manually force it closed. Then there's a 'squeegee actuator micro switch'; check that is working.

The schematic is kind of chopped off, but basically it looks like power flows through the contactor (which is energized through the micro switch) through the motor, and returns through a circuit breaker. If the contactor is not energized, the diode assembly could be bad; you'll have to remove it to test it if your meter has a diode test function.

Put your meter negative terminal on the point that looks like a hex nut with minus sign next to it that runs to the breaker. (Not sure what that is physically). Measure your voltages with respect to that point.

Be careful! There's got to be 120V in there somewhere; plus all that stuff spinning around. But at least you're in a church, so you won't have to travel far for the funeral.
 

Be careful! There's got to be 120V in there somewhere; plus all that stuff spinning around. But at least you're in a church, so you won't have to travel far for the funeral.

First..thanks barry for your response.

Second..LOL that last line is pretty darn funny!
Third..I'm not a complete doofus LOL. Why would there have to be 120V in there, on a 36V machine?
Fourth..I'm a pretty accomplished Cabinet maker so spinning things are not new to me.:)

- - - Updated - - -

Why would there be 120V on a 36V machine? That hex nut is exactly that, with a stud. So now remember my opening comment? to test the terminal block I would contact the neg hex/stud w the black lead of the DVM, then try to reach any of the terminals of the block with the red lead?
I'm not sure when exactly the motor is supposed to run..when the scrubbers are engaged, or the forward drive, or soon as the brake is disengaged, or what.

check the "contractor for vacuum motor"..how?
 

Ok, I didn't realize this was a battery powered unit.

Yup, use black lead to the minus stud, red lead to other points. If you go to the circuit breaker, there should be zero volts on both terminals, if not, that means the breaker is open. I assume you've tried pushing the reset button on the breaker.

Then I would go to the contactor(relay). Two terminals are for energizing the coil; the other two terminals are the "switch" part of it. Sometimes these gizmos are open so that you manually push the switch closed; sometimes they're enclosed, so you can't get at the mechanism. You should see 36 volts on both sides of the switch part. If you see 36V on only one terminal, that means it's not getting energized. Move on to the micro switch.

The microswitch could be anywhere; apparently it has something to do with the squeegee. The chopped-off part of the schematic is where the signal that goes to the microswitch is. I assume it goes to negative(since the other side of the coil is connected to +.)
 

Be careful! There's got to be 120V in there somewhere; plus all that stuff spinning around. But at least you're in a church, so you won't have to travel far for the funeral.

LMAO... Another pearler Barry. :laugh: :thumbsup:

Jokes aside, ron-e-g can you please refer to the picture below:

1vrf0dh.jpg
36V Motor

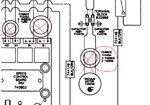
Looking at your modified circuit, there is a good possibility that your problem could be due to damaged or seized switches.

The area shown in (BROWN), what you can do here is to bridge the point of the wire shown with the arrow with a wire from the negative bolt to which should activate that switch.
You'll need to power up the unit for this test.
If you have some wire with crocodile clips on either side, just attach one end to your - minus bolt,
and attach the other end to the switch on the terminal of the indicated wire.
Hopefully when you do this, you should be able to hear an audible click.

The rest of these tests do not have the unit powered...

The are shown in the (BLUE) area, You can attach your multi-meter probes, as shown, and set to read low ohms, measure it, then actuate the switch manually if its accessible. You should get a
very low ohms reading if the switch is OK.

The (GREEN) circled part is your overload switch. You need to press it to make sure its not stuck. It should be soft to press, go almost all the way down. But if you feel very low travel, then there's a good chance this may be your problem, thus it would need to be replaced with an identical type.
By the way, the circuit breaker switch is not meant to click.

The one marked with the (PURPLE) rectangle, you should be able to switch it on and off, but I'm not sure you'll get a noticeable switching sound. Use you meter to check for low and infinite ohms.

With the coloured circle in (RED), you can do the same as the (BLUE) one. Once again, using your multi-meter, though this time, I'm not sure what you'll get in regards to low or infinite ohms when you actuate it, but as long as you get very low ohms on either switching or un-switching and infinite
ohms on the other.

The last item shown with the (PINK) square, use your multi-meter once again. On this occasion you won't get very low ohms due to a series diode built into the switch. Though in one direction you should get infinite ohms, the opposite direction should get you a low "k" ohms reading.

I hope the above helps and please let us know how you get on.
Regards,
Relayer
 

https://www.floorequipmentparts.com/downloads/Minuteman/Auto Scrubbers/MC32036QP_CE.pdf

Thank You both berry , and Relayer for your responses. Relayer that diagram is very helpful to a noob like me! I now have a reasonable plan of attack! I posted a link to the machine's owner/user manual that includes the wiring diagram complete.
One (more) bone head question before I go off with DVM in hand! If I can't physically connect the Meter leads to both neg. term and pos. wire because of distance between.. do I attach a extension wire to the neg terminal, then attach the meter lead to that? or is there another, better way?

- - - Updated - - -

Sorry, one more thing to be clear use this setting in the multi-meter?

20180725_161535.jpg
 

No, no, no! You'll blow the meter fuse!! Put it on th "V" setting- you're measuring voltage, not current. Not sure how that meter works, but you want to measure D.C. not A.C. Maybe that Select button...

There are probably other points where you can get the negative potential, but, sure, use a wire. Just be careful it doesn't inadvertently short to something.
 

Thanks berry. Curious..what does the ferrite, 3 passes, and 2 turns indicate? Also what does the double circle symbolize?

what are these.JPG
 

The ferrite is just a filter. The double circle is not a standard schematic symbol (afaik), but physically the ferrite can be a toroid.
 

Just got back from the church. After looking the scrubber over..I'm even more confused! Doesn't red/white mean the wire is red and white? or can it mean red OR white? Is black wire signified differently at times? The overall wire coloring is not what I see in the schematic in some cases.:bang:
 

Red/white probably means red with a white stripe. But there's no law that says they use the actual colors called out in the schematic. Just try and measure at the terminals of the devices and dont worry about the wire color.
 

That's just it. It makes it kinda hard for a guy like me to identify said devices if the wire colors don't match. For instance. there is a large actuator looking thing mounted to a large removable panel on the back of this machine where all the other controls are. It is hidden when the panel is in place, however it ha a cable connecting the squeegee portion of this machine. It appears it would slide up and/or down. It does neither near as I can tell. It has a large connector with one yellow wire. There is a red wire hanging in the machine that looks to be of a type that might go into the connector also. the connector does indeed have a slot for it. the other ends that connect the cylinder component have a one yellow and one blue wire. The blue wire confuses me. I can find no such devise on the schismatics.

I think this might be the squeegee actuator switch not sure. When I try to follow the wires it gets confusing as the device where it goes, also doesn't have recognizable wiring. Case in point the fwd/rev switch I see.. has no red/white wires connected. I will try it again today. I will take some pictures to help try to explain my delima.

It might pay for you to look up some of the parts online to verify what your looking at. In the schematic it shows a yellow and red wire going to the brush actuator. I looked up the part and found one. The actuator for sell had about 5 inches of yellow and red wire coming out with a snap connector on the end of it. Verify where the loose wire goes from the actuator and if it matches your schematic you should be good to go.
 

Thank you Kajunbee great idea.

I actually did start that process. seems the large actuator thing is; (10-# 320012 1 Linear Actuator - Squeegee) when I connected the loose red wire to the connector (first/second pic.) the squeegee now raises, and lowers with the use of either forward or reverse levers! Vacuum motor still not running. However bad news is, I touched the black lead with alligator clip to the red wires (Third pic.) on the brush switch by mistake, and got a huge ark..welding! (melted the end of my clip) now the brushes wont spin , and I have no forward, or reverse motion! The brushes still raise , and lower with that switch ,but the rest went dead.

I'm pretty sure I'm done. This would be hard enough with proper wire coding. With out it is only practical for a person that knows this machine or electronics!
 

Attachments

  • 20180727_070939.jpg
    20180727_070939.jpg
    458.1 KB · Views: 166
  • 20180727_072109.jpg
    20180727_072109.jpg
    523.5 KB · Views: 168
  • 20180727_070908.jpg
    20180727_070908.jpg
    530.8 KB · Views: 169
  • 20180727_072032.jpg
    20180727_072032.jpg
    421.9 KB · Views: 162
  • 20180727_070850[1].jpg
    20180727_070850[1].jpg
    537.9 KB · Views: 167
  • 20180727_072036[1].jpg
    20180727_072036[1].jpg
    505.8 KB · Views: 160

Sorry I'm still getting filtered on my post. I guess by the time I get approved the time to edit my post has elapsed. The connector is in photo 4, and 6. The brush switch is shown front photo 3, and back in photo 5. arrow indicates where the short occurred. Any help to fix this new issue greatly appreciated. Tried the brush re-set already.
 

Best case, you blew a fuse or breaker. You just need to find it. The schematic you posted is incomplete, maybe theres a breaker on one of the cutoff sections.
 

Sorry I'm still getting filtered on my post. I guess by the time I get approved the time to edit my post has elapsed. The connector is in photo 4, and 6. The brush switch is shown front photo 3, and back in photo 5. arrow indicates where the short occurred. Any help to fix this new issue greatly appreciated. Tried the brush re-set already.

There are two breakers. One for vacuum and one for the brushes. You said you reset the brush, so I'm guessing you mean the breakers. Just to make sure test the breakers with your meter again. You can test with the wires connected. Or you can remove the wires and ohm the switch out. If your not familiar it's the setting with the horseshoe looking symbol. It may be better to ohm the breaker because the solenoids or contactor may or may not be pulled in. You don't need the power on when you ohm the switch. If you send current through the meter on ohms setting you might blow a fuse or damage your meter. If you have any reservations just ask and someone will try and help. I'm headed off to work so good luck.

- - - Updated - - -

If your measuring voltage across breaker from ground the solenoid position shouldn't matter.
 

Thanks Barry. The complete schematic is shown in the link I posted #6. I don't believe there are any fuses. I hope I'm wrong though.

Kajunbee. Thank you for your response. I have tried to re-set both and I never feel, or hear any click. I'm not familiar wit these type most I'm used to have a distinct snap, or click when they have been tripped.

So to be clear I would set meter to the (horseshoe) setting (with machine off) and touch the red lead to one wire ,and the black to the other? At this point I should be reading what on the meter if the breaker is good? I guess zero is breaker open, and any reading is breaker closed or "set" ?
 

Attachments

  • 20180727_072046[1].jpg
    20180727_072046[1].jpg
    493.1 KB · Views: 147

Other way around. Zero (or close to it) means the breaker is closed-it will conduct current. O.L., or something like that (high resistance) indicates that it's open. And that's not a horseshoe, it's an omega, the symbol for Ohms.
 

Thanks for clarification Barry.
And that's not a horseshoe, it's an omega, the symbol for Ohms.
Yea, Good to point out!

- - - Updated - - -

- - - Updated - - -

In light of the fact there are no fuses on this machine. Shouldn't the brush breaker have tripped when the short occurred?
 

Status
Not open for further replies.

Part and Inventory Search

Welcome to EDABoard.com

Sponsor

Back
Top