Continue to Site

Welcome to EDAboard.com

Welcome to our site! EDAboard.com is an international Electronics Discussion Forum focused on EDA software, circuits, schematics, books, theory, papers, asic, pld, 8051, DSP, Network, RF, Analog Design, PCB, Service Manuals... and a whole lot more! To participate you need to register. Registration is free. Click here to register now.

[SOLVED] ATTiny85 PCB resetting itself

Status
Not open for further replies.

PCBAlex

Newbie level 3
Newbie level 3
Joined
Aug 31, 2017
Messages
3
Helped
0
Reputation
0
Reaction score
0
Trophy points
1
Activity points
48
I am creating a project that reads a photo interrupter and controls an LED and Servo. The setup mode where the led turns on when the photointerupter in interrupted works fine but the mode where the servo goes off isn't functioning like on the breadboard. I didn't realize that on the breadboard I had the zener diode wired backwards (I corrected this on the PCB). Unfortunately on the PCB it looks like the relay triggers but then the ATTiny85 appears to reset and the process repeats itself rather than going into a completed state. The servo also doesn't activate. Removing the diode doesn't change the result and wiring it backwards just causes the led to slowly dim without the relay going off. I have tried using a schottky diode but that didn't help. See wire diagram and code below. I would be happy to provide any additional information. Thanks for any help in advance.


View attachment Schematic.pdf Board Top.PNGBoard Bottom.PNGBoard copper pour hidden.PNG
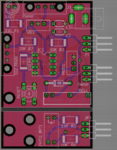
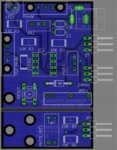
Code:
#include <SoftwareServo.h> 

SoftwareServo my_servo;       

int ledpin = 0;   
int relaypin = 3;
int modepin = 4;
int servopin = 1;
int optopin = A1;

int servh = 8;    // Servo home position
int offpos = 92;  // Servo position to hit power switch on printer 

int ro = 0;       // counter to ensure turn off procedure runs once per print 

void setup() { 

//Serial.begin(9600);          

my_servo.attach (servopin);         
pinMode(ledpin, OUTPUT);
pinMode(relaypin, OUTPUT);
pinMode(modepin, INPUT);

digitalWrite(ledpin,LOW);    
digitalWrite(relaypin,LOW);  
delay(50); 

}

void loop() {
  
  int modeval = digitalRead(modepin);   //checks to see if hardware is in setup mode or standard operating mode
  //Serial.println(modeval);
    
  while (ro == 0 && modeval == 1){        //loop ipd untill printer is detected to have finished. runs turn off protocol twice to ensure it worked  
    ipd();
    modeval = digitalRead(modepin); 
  }

  while (modeval == 1){                  //runs on completion of ipd to show complete status   
    fin();
    modeval = digitalRead(modepin); 
  }  

  sud();                                //runs setup mode
  ro = 0;
    
  }
  
void ipd(){
  
  delay(500);
  int sensorValue = analogRead(optopin);     // Reads the values produced by the photo interruptor on analog pin 0

  if ( sensorValue < 2 ){               // If photo interrupror beam is broken 

    digitalWrite(ledpin, HIGH);     
    delay(3000);                        // Gives printer time to cool off hotend

    for(int i = 0; i < 2; i++){
      my_servo.write (servh);           // this will mostly eliminate servo twitch
      digitalWrite(relaypin,HIGH);
      delay(45);
      SoftwareServo::refresh();                  
      
      smove(offpos);          // Turn servo to x degrees to shut of 3D printer buy hitting power switch
          
      smove(servh);           // Turn servo to x degrees to home position
                  
    } 
                         
    digitalWrite(ledpin, LOW);      
    digitalWrite(relaypin,LOW);     
    ro = 1;  

    }
}  

void fin(){
  
  digitalWrite(ledpin, HIGH);  
  delay(250);
  digitalWrite(ledpin, LOW);  
  delay(250);

    }

void sud() {
   
  int sensorValue = analogRead(optopin);     // Reads the values produced by the photo interruptor on analog pin X  
  //Serial.println(sensorValue);        
  
  if ( sensorValue < 2){                // If photo interrupror beam is broken
    
    digitalWrite(ledpin, HIGH);        
  }
  else{
    digitalWrite(ledpin, LOW);        
  }

}

void smove(int x){

  for(int i = 0; i < 40; i++){
    my_servo.write (x);          // Turn servo to x degrees to shut of 3D printer but hitting power switch
    delay(25);
    SoftwareServo::refresh();
  }

    }
 

what is the current capability of 12v supply ?
Can it source the servo motor current requiremnt ?

Are the filters adequate in supply line?
The filters in 7805 -are those are the only ones or any other included ?
 
Hi,

I agree with srizbf. Use a bulk capacitor at the 12V side.
And (because you are switching heavy loads at the 5V side) use a bulk capacitor at 5V, too.

Currently you use two layer for routing ... then you fill them with copper pour.
--> It is far better to use one layer for signal routing without copper pour
and the other layer for GND (and only some unavoidable - very short - traces)

Here the critical path when you switch ON the relay (yellow). It is very wide and it changes layer several times. The pulse current needs to travel through pin1 of JP1 (missing device name in board). This may create problems with the snesitive photointerrupter signals.
The same critical is the pulse pathe when the servo is switched ON.
pulse_flow2s.jpg

Use a capacitor at RESET.

Use an RC filter and protection diodes at the servo feedback (pin 6 of uC)

Every line that leaves the PCB should be protected against ESD.

Don´t use those "mechanical drawings" (voltage regulator, switches, Mosfet, IC) in a schematic --> use standard symbols.

Klaus
 
Consider that the servo has an inbuilt power supply bypass capacitor which momentarily shorts the 5V power supply when the relay turns on. A large 5V bulk capacitor is a possible solution, but it may be much easier to filter only the processor supply (along with the 5V supply for R2). Increasing the 5V bulk capacitor also causes more relay arcing.

I believe that switching the servo power supply with a relay is essentially a bad idea.
 
Thanks for all your feedback guys! As I'm sure you can tell this is my first PCB.

srizbf the power supply is capable of 3 amps. I will add bulk capacitors in the next rev.

KlausST I will work on implementing your comments in a rev 2 of the board. Thank you so much for the thorough response.

FvM I was able to fix the problem by eliminating the relay and powering the servo from the MOSFT. I had to also add a bulk capacitor across the servo power. The PCB looks a little Frankenstein now but it works

Cheers!
 

Status
Not open for further replies.

Similar threads

Part and Inventory Search

Welcome to EDABoard.com

Sponsor

Back
Top