Continue to Site

Welcome to EDAboard.com

Welcome to our site! EDAboard.com is an international Electronics Discussion Forum focused on EDA software, circuits, schematics, books, theory, papers, asic, pld, 8051, DSP, Network, RF, Analog Design, PCB, Service Manuals... and a whole lot more! To participate you need to register. Registration is free. Click here to register now.

[SOLVED] [moved] Designing Interface Adapter for Gamecube Controller

Status
Not open for further replies.

darkwingduck

Newbie level 6
Newbie level 6
Joined
Aug 4, 2015
Messages
12
Helped
0
Reputation
0
Reaction score
0
Trophy points
1
Visit site
Activity points
90
hi guys please help im new to this
i need to make this...
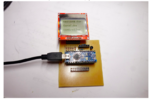
it is a adapter for my 3ds to use a gamecube controller
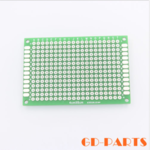
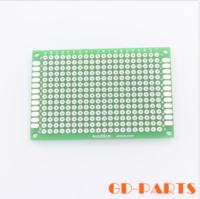
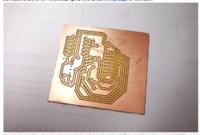
i can get all the parts needed except the "board" in the instructions the guy said for the board i will have to find a way to make it. my question is can i use this ( since this is what i can buy )
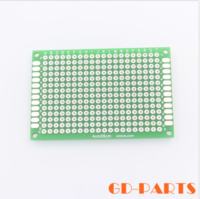


in order to make this
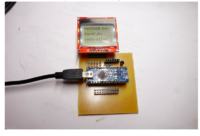

this is what he used
 

Attachments

  • Screen Shot 2015-08-03 at 11.11.41 PM.png
    Screen Shot 2015-08-03 at 11.11.41 PM.png
    529.9 KB · Views: 134
  • Screen Shot 2015-08-03 at 11.11.25 PM.png
    Screen Shot 2015-08-03 at 11.11.25 PM.png
    587.4 KB · Views: 142
  • Screen Shot 2015-08-03 at 11.09.34 PM.png
    Screen Shot 2015-08-03 at 11.09.34 PM.png
    251.1 KB · Views: 132

thank you so much, yes it is an arduino mini it is used to map the buttons to your desired settings. the materials will cost me around 20 but there is a company that will do it for you for 125 but they somehow incorporate it into the system im wondering if its just worth sending the system to them.
 

Sure, with a spool of appropriate gauge insulated wire and the protoboard shown in your image, it should not be a problem.

Just keep the wire jumpers as short as possible and try not to let the leads to the Nokia LCD display or any of the headers cross. Try to keep them orderly and in parallel, this is especially important with clock and serial lines, like those to the SPI interface to the LCD display.

You also might want to add a small bypass/decoupling ceramic capacitor (.1µF/100nF) across the VDD and GND pins of the LCD display, this will help minimize any noise and its propagation on the power supply rails

What exactly is the blue module incorporated into the design, Arduino Mini or some other microcontroller module?


BigDog

- - - Updated - - -

As the Arduino Mini's interface lines are not particularly high speed, you shouldn't have any problems as long as you observe the recommendation I posted.

Also, note I added another comment above concerning the addition of a bypass/decoupling cap.

Are those header sockets for cables to the device you intend to interface?

If so, and you are making those cables as well, you might want to cannibalize an old PC parallel cable of some sorts, which will keep those lines from crossing as well.

If the interface cables were of a particularly high speed, I would also recommend using every other wire as a ground line between the data and clock lines the cable was carrying.

However, in this case considering the Arduino Mini port speed limitation, I suspect it would not be necessary.


BigDog
 
hey big dog thank you again yes the header sockets are for cables from the device

but the more you help me the more im starting to realize how far out of my league i am with this project i can follow basic instructions and i am good with a soldering iron but man i feel like in his instructions i would have to just make something that "looks" like it bc im not sure how to even do it.... here have a look and tell me what you think. am i just not seeing it?

- - - Updated - - -

i guess what i am asking bigdog is how would you go about this project if you where me and had the limited knowledge that i do when it comes to electronics
 

ohh man i forgot attach the document here you go
 

Attachments

  • gc3dsinstruction.pdf
    11.6 MB · Views: 142
Last edited by a moderator:

I don't see any particularly complicated issues, if you feel you can disassemble, solder the connections and then reassemble the device, just take is slow and keep it organized.

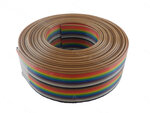
I would probably use multicolored flat cable for the connections, which you can buy on eBay:

multicoloredflatcable.JPG

You can simply divide the cable into however many conductors you need and use the color coding to aid in keeping the connections organized.


BigDog
 
try not to let the leads to the Nokia LCD display or any of the headers cross. Try to keep them orderly and in parallel, this is especially important with clock and serial lines, like those to the SPI interface to the LCD display.
Uh, you must never have worked on old wire wrap boards. Techs that like to route everything neat and clean were the ones you avoided wire wrapping your board, those lazy ones that just made the board an ugly mess of crisscrossing wires were the ones you lined up for!

Running clock lines parallel with your data lines will allow the aggressor wire to generate noise on the victim if the aggressor signal has fast edge rates and/or large voltage swings (think old 5V 74LS logic). Of course if everything is under a couple of inches you won't have any issue and clean routing is probably easier to debug and build.
 

Uh, you must never have worked on old wire wrap boards. Techs that like to route everything neat and clean were the ones you avoided wire wrapping your board, those lazy ones that just made the board an ugly mess of crisscrossing wires were the ones you lined up for!

I can assure you, I quite familiar with wire wrap boards and wire wrapping techniques after decades of using them to construct countless boards. I still have, in fact, stacks of wire wrap protoboards of all shapes, sizes and bus patterns. I also still have dozens of wire wrapping tools, both manual and electric and bins full of precut and trimmed wire.

Fortunately, those days appear to be over.

Running clock lines parallel with your data lines will allow the aggressor wire to generate noise on the victim if the aggressor signal has fast edge rates and/or large voltage swings (think old 5V 74LS logic). Of course if everything is under a couple of inches you won't have any issue and clean routing is probably easier to debug and build.

While, my choice of the term "cross" was not well chosen, I was simply attempting to convey the importance of keeping the signal lines as short as possible forming a point to point connection, rather than allowing them to meander around the design co-mingling and perhaps generating crosstalk with numerous other signal lines. Also, as I'm familiar with the Nokia 5110/PCD8544 LCD display, I realize the SPI SCLK line is typically located at the far end of the header next to the backlight, therefore if this order is maintained it would minimize the possibility of crosstalk affecting other signal lines.

I've learned from my decades of wire wrapping, that the bird's nest of leads were far from immune to crosstalk and when it became an issue, as it often did, troubleshooting and correcting the problem could be literally a nightmare, of troubleshooting to determine the culprit(s) and detaching numerous wire wrapped leads just to reroute one or more lines.

Although, the bird's nest typically formed an environment for signal line intersection, it also often provided the means for other forms of signal interference, which were typically more difficult to troubleshoot and far less pleasant to correct.

As I indicated in a previous reply #3:

If the interface cables were of a particularly high speed, I would also recommend using every other wire as a ground line between the data and clock lines the cable was carrying.

Which are the some of the same techniques employed in many 80 conductor parallel cables used to carry both clock and data lines, for the standards like ATA-5, ATA-6, etc., at throughput rates in excess of 100MB/s.

Also, as I previously, indicated if the lengths of cable are kept to a minimum, a few centimeters, at which point the inductance and crosstalk coefficient which exists between two parallel conductors is for the most part negligible in view of the overall design requirements.

In the future, I'll attempt to choose my words more carefully.

BigDog
 
I've learned from my decades of wire wrapping, that the bird's nest of leads were far from immune to crosstalk and when it became an issue, as it often did, troubleshooting and correcting the problem could be literally a nightmare, of troubleshooting to determine the culprit(s) and detaching numerous wire wrapped leads just to route one or more lines.

Oh, gosh darn why did you have to go and remind me of that. Now I'll have nightmares tonight about trying to fix wire wrap boards with intermittent problems.
 

Oh, gosh darn why did you have to go and remind me of that. Now I'll have nightmares tonight about trying to fix wire wrap boards with intermittent problems.

Yes, justly deserved I would think, as you first brought up the subject. :wink:

I cannot tell you how many sleepless nights I spent after troubleshooting a wire wrapped design for countless hours, mulling over every possible cause of an issue. And then, with a sudden flash of inspiration, finding myself out of bed and back at the workbench, scope probe in one hand and wire wrap tool in the other just as dawn was breaking.

BigDog
 
ok so one final question how can this board that is just holes that do not have any electrical connections


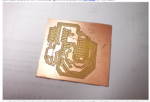
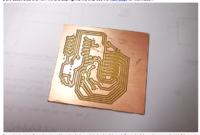
accomplish the same as this one that has a pattern that clearly will conduct in a specific manner.


keep in mind this is the first time i am taking on a project such as this and i am here to learn. with that said thank you all for the help thus far
 

Do you have a schematic of the required design of which the PCB you have shown is based?

If not, you need to construct your own schematic by following the traces of the PCB and drawing a corresponding connection on the schematic.

There are several free schematic design applications available online.

Then the real fun starts, planning and arranging the Arduino Mini and inline header sockets in some usable fashion.


BigDog
 
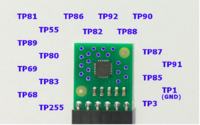
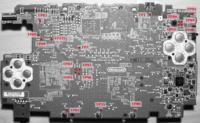
alright guys after some research online i was going about this all wrong there is a guy people online refer to him as a "hacker" named loopy that makes a chip much much smaller that fits in the system its only $15 shipped!!!.... and the best part is that its already made!!! all my dumbass has to do now is match the points shown with wires check it out im so excited bc this is more suitable to my skills lol

check out the pics if you had to do this what kind of wires would you use? thats the only thing i am confused about the rest should be a cake walk


Please post a reply as to whether or not you have a schematic.

If not, I'll try and step you through the process of making a usable schematic.

big dog i do not have one. i appreciate you willing to show me how to make a schematic and in the very near future i will take you up on that offer but luckily i found a chip that is much smaller and ready to be dropped in. for the future should i buy any supplies for when you will walk me threw making a schematic?
 

check out the pics if you had to do this what kind of wires would you use? thats the only thing i am confused about the rest should be a cake walk

Oddly enough the wire in the following image looks like 30 AWG insulated wire wrapping (Kynar) wire. It appears ads-ee's remarks are coming back to haunt me once again.


Although, basically any available single conductor isolated wire which would will fit in the solder points on the following board would do just fine.


It's not that critical.


BigDog
 
ohh man ads-ee got you good! lol well bigdog i thank you so much for your help i think i got it from here out, even though this is probably the simplest project ever posted on this forum i will post pictures once its all said and done hopefully you and others can give me feedback on it, maybe ways i can improve for future projects.

once again thank you for your kindness
 

hey guys im in the middle of the project as i type this but i wanted to ask you if this looks about right to you i ask bc i dont have a multimeter so i wont know if i did good until i put it all together. anyways do they look ok? coild i possibly have crossed or ruined something?
 

Hmmm, melted insulation usually means you used to hot of a soldering iron or held it in place for to long.
 

Status
Not open for further replies.

Similar threads

Part and Inventory Search

Welcome to EDABoard.com

Sponsor

Back
Top