Continue to Site

Welcome to EDAboard.com

Welcome to our site! EDAboard.com is an international Electronics Discussion Forum focused on EDA software, circuits, schematics, books, theory, papers, asic, pld, 8051, DSP, Network, RF, Analog Design, PCB, Service Manuals... and a whole lot more! To participate you need to register. Registration is free. Click here to register now.

How to Post Images and Upload Files to the Forum

Status
Not open for further replies.

BradtheRad

Super Moderator
Staff member
Advanced Member level 7
Joined
Apr 1, 2011
Messages
15,579
Helped
2,912
Reputation
5,836
Reaction score
3,049
Trophy points
1,393
Location
Minneapolis, Minnesota, USA
Activity points
116,681
Several options are available for adding images to your posts:

(a) Add an Image, or (b) Manage Attachments, or (c) Insert Image

------------------------------------------------------------

"Add an Image" function

Tutorial: How to use the "Add an Image" button when composing a post.

You can add up to ten images with this method.

------------------------------------------------------------

Click the "Add an Image" button (found below the window in which you compose a post).

7307467600_1415903103.png


An 'Upload Image' window opens.

Notice the list of allowed graphics formats. Notice the maximum size.
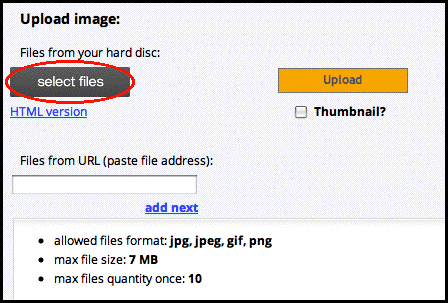
5730240300_1415903426.gif


Click 'select files' to open a disk navigation window.

Select your desired file, and click 'Open'.

Back to the 'upload image' window, click 'upload'.

(The larger your file is, the longer it takes to transfer, both for you and readers.)

If successful, a window displays your uploaded image.
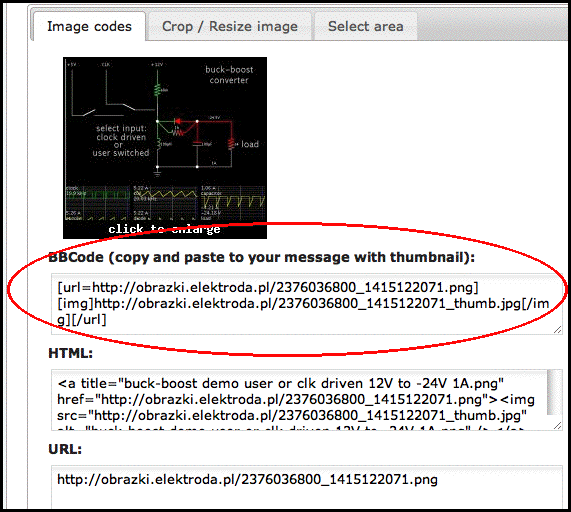
5257042500_1415903232.gif


Look at the fields containing url links.

The 'BBC code' is a practical choice. It contains a link to your image.

If your image is large it will be a thumbnail. The thumbnail will appear in your post as a clickable which opens your full-size image.

Copy text. Paste it into your post.

Preview your post to see how it will appear.

Done!
 

Image Posting Tutorial

The Manage Attachments function

------------------------------------------------------

Tutorial: How to view and manage your attachments

Edaboard provides members with a storage area to keep your collection of files. These can include images and documents.

------------------------------------------------------

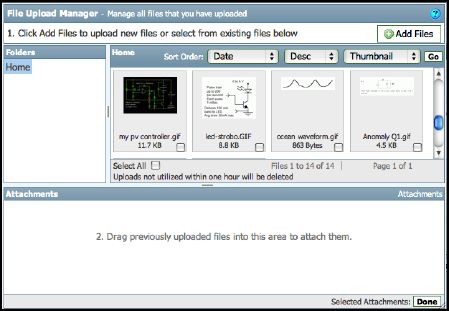
Click the "Manage Attachments" button (found below the window in which you compose a post).

3752406500_1415861784.gif


A window opens, displaying your stored files.

6050380200_1415862284.jpg


Hover the mouse over an icon. A '?' appears in a corner. Click to see 'Asset Usage', meaning where you have used this attachment previously in a thread.

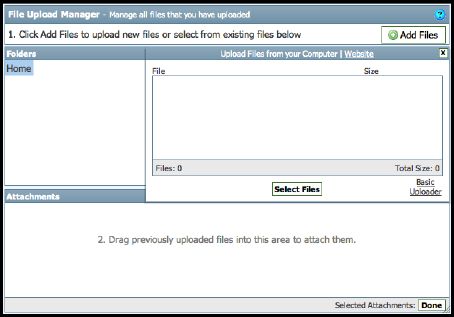
Click 'Add files'. A navigation window opens.

Select one or more files. Click 'Select files.' (The larger your file, the longer it takes to upload.)

7737900300_1415862417.jpg


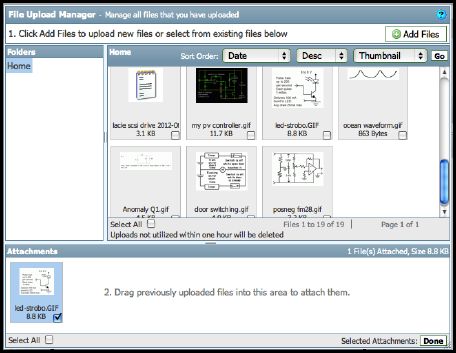
Your updated collection appears.

To add an item to a post, drag its icon into the lower box.

Click in the check box to mark items which will be added to your post.

2342671300_1415863511.jpg


Click 'Done' when finished. Links are added to your post automatically.

Preview your post to see how it will appear.

Done!
 

Image Posting Tutorial

'Insert Image' function.

Tutorial: How to use the 'Insert Image' button when composing a post.

Quick and easy way to add an image to a post.

(After you use this particular method, we suggest that you re-check your post within 20 minutes, and confirm that your image still appears properly, and that it opens properly. If you see a notice saying 'invalid attachment', then you should post a follow-up reply which has your image attached using another method.)

----------------------------------------------------------------------------------

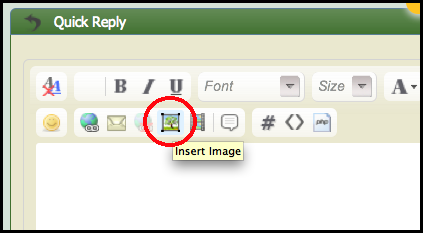
Locate the "Insert Image" icon (near the top of the Quick Reply window).

Hover the mouse over it and the words "Insert Image" appear.

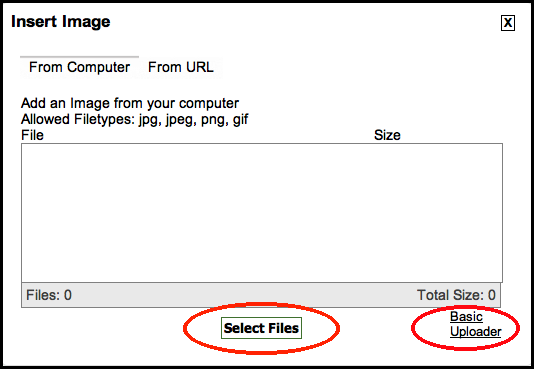
3470029700_1416104074.png


Click it to open a command window.

3043589200_1416100100.png


(Notice the list of allowed graphics formats.)

Click 'Basic Uploader' to do only one file. Or alternately, click 'Select Files'.

A disk navigation window opens. Select a file and click 'Open'.

(The larger your file, the longer it takes to transfer, both for you and readers.)

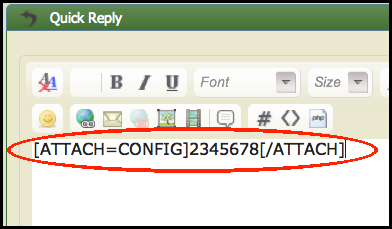
The link is inserted into your post automatically.

3343758100_1415598108.png


Preview your post to see how it will appear.

The attachment becomes a clickable thumbnail.

Done!
 

Image Posting Tutorial

General guidelines

  • Image compressing
Do not upload images in expensive formats, such as BMP, which unnecessarily overload the system, and also cannot be previewed on browser. Prefer compressed ones as PNG, or even JPG. If you are Windows user, can easily convert the original format just opening it on Paint tool, selecting a filter for save at another format:

broken link removed

  • Image host
Do not refer to images uploaded at external free file servers ( 4shared, ImageShack, imgur, photobucket, etc… ) due to be essentially temporary hosts. After a certain time these images will be no longer available, becoming null the thread for further researches. The only allowed external server is the one linked on button "Add an Image", present at right bottom corner of the post edit page.

broken link removed

  • Image amount
Do not upload lots of pictures referring to the same purpose, specially if took by similar angle and scale. If you intend to show not a single picture, prefer one image for overview sight, and another one for details on a closed view, and subsequently.

Prefer do this...
broken link removed
Instead of this...
broken link removed

  • Image insertion
As much as possible, avoid insert inline images inside text body, either attached or on reference link, due this brings a break on reading, forcing members to find the point where text effectively continues. Prefer highlight it on next line, just typing few times <ENTER> key before and after.

Avoid do this...
The inline insertion of this image broken link removed on text and the insertion of another image like this broken link removed impacts on post appearance. Also, note that the insertion of a link of an image on text as this https://www.edaboard.com/attachments/105155d1399730057-schematic_preview.png and the insertion of another image as this https://www.edaboard.com/attachments/105153d1399729120-pcbpreview.png turn the post much more hard to understand

Preferring to do that...
The inline insertion of this image on text
broken link removed

and the insertion of another image like this, impacts on post appearance
broken link removed
Also, note that the insertion of a link of an image on text as this
https://www.edaboard.com/attachments/105155d1399730057-schematic_preview.png

and the insertion of another image as this
https://www.edaboard.com/attachments/105153d1399729120-pcbpreview.png

turn the post much more easy to understand

  • Image area
Take care to do not waste viewable area of image with useless content, as for example print previewing on a sheet much larger than current draw.
broken link removed
 
Last edited by a moderator:

Status
Not open for further replies.

Part and Inventory Search

Welcome to EDABoard.com

Sponsor

Back
Top