This article will introduce the method to implement USBNET mode using the Forlinx Embedded OK3568-C development board. Before that, we need to know what is USB Gadget.USB Gadget refers to an electronic device that is developed to connect to a host via USB in USB peripheral mode.
For example, when a mobile phone is plugged into a PC through a USB cable, the mobile phone is a USB Gadget. Similarly, in the article, the mobile phone is replaced by the OK3568-C development board.
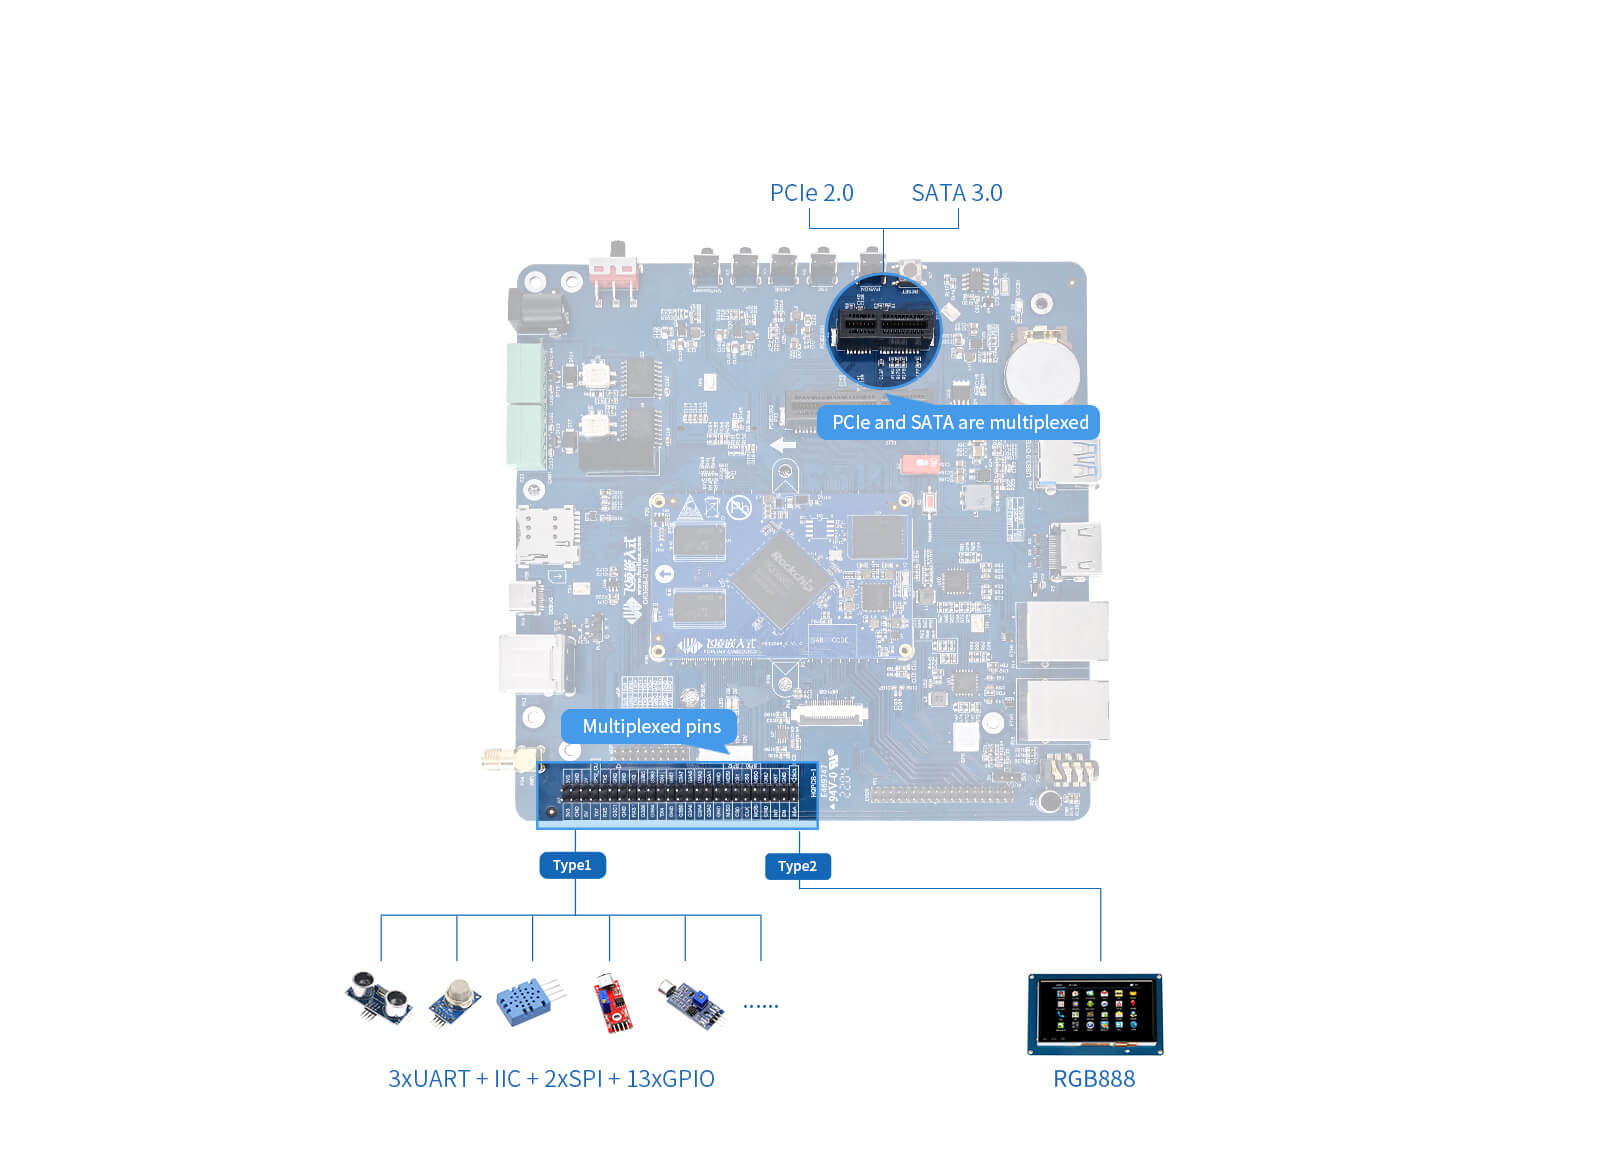
The Gadget framework provides a set of standard APIs at the bottom layer,and the USB Device Controller (UDC) driver implements this set of APIs. Different UDC (usually part of the SoC) requires different drivers, and even different boards based on the same UDC need to modify the code. If we want to implement USBNET, we also need a driver, which is called RNDIS. The RNDIS driver is present in the kernel, you just need to find the configuration entry and compile it into the kernel.
First go to the source kernel directory and enter the menuconfig graphical configuration screen:

When entering menuconfig, you need to specify the environment.Otherwise the graphical configuration interface entered by executing make menuconfig directly is for the X86.
As shown in the figure below, the ARM architecture is the correct graphical configuration interface:

Press/to enter the search interface:

Directly search for rndis and find the directory with the word "USB Gadget". You can see that there are multiple paths. You can directly enter the USB Gadget directory to see that it is the option to configure RNDIS.
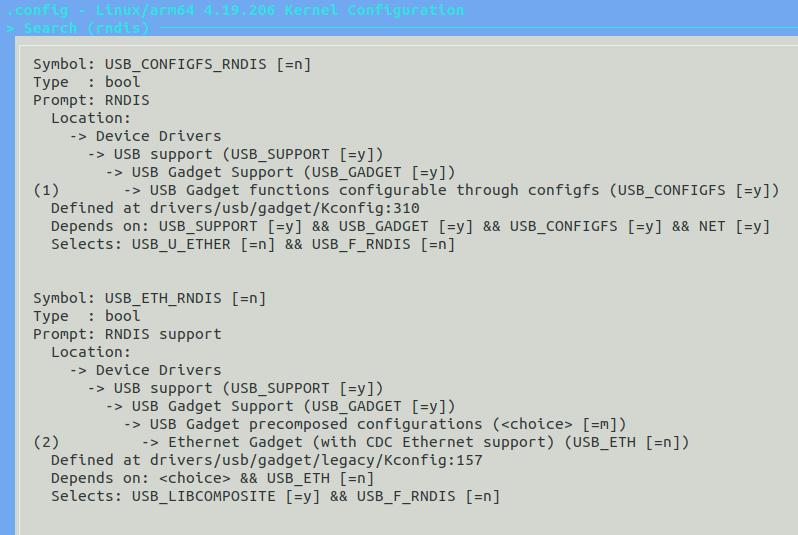
After searching, the final path is shown as follows:

Turn on the RNDIS driver and select some network protocol configurations, as shown in the circle below:
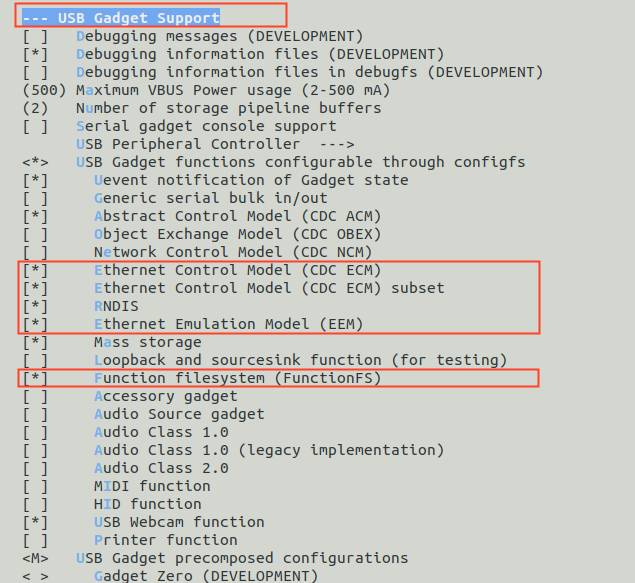
Find the USB Gadget precomposed configurations and compile RNDIS into the kernel (if you choose to compile it into a module, compiling the kernel alone will not generate a.ko file. In order to save the tedious mounting steps, this article compiles RNDIS into the kernel).

After the configuration is completed, press the Exit key to exit, and select yes for "Save or not":

Return to the source code directory to enter the build. Sh script, and comment out the defconfig command to generate the.config file, so that the menuconfig configuration takes effect. The comment location is as follows:

Save and exit, compile the kernel separately, and execute the./build. Sh kernel under the source code directory. After compilation, boot. IMG files are generated in the kernel directory.

Use RKDevTool, the burning tool provided by Rockchip, to update the image in a single step. Press and hold the Recovery key and press Reset until the programming tool displays that a LOADER device has been found and then release the Recovery key.
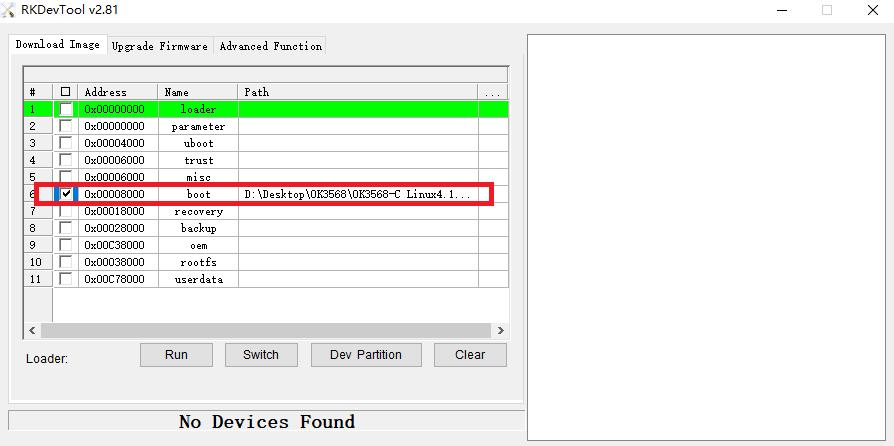
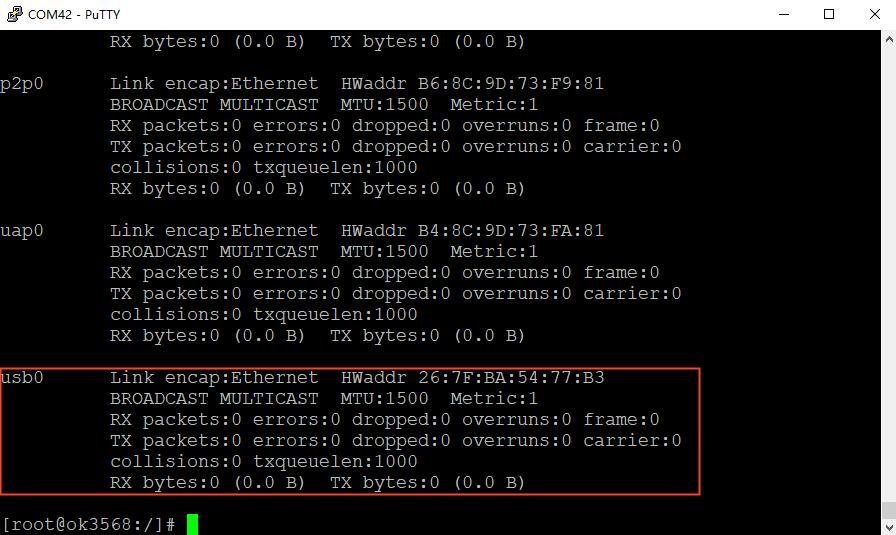
Replace the position in the figure, click the device partition table, and then click Execute. After the device restarts, the burning is completed, and there will be burning progress on the right side. After the development board restarts, ifconfig -a shows that the usb0 node is generated.
Some of the more interesting features can be achieved with the Linux USB Gadget device driver:
Force USB output to device
echo peripheral > /sys/devices/platform/fe8a0000.usb2-phy/otg_mode
The print information is shown as follows:

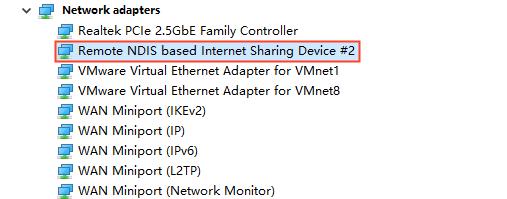
This node can be seen on the device manager network adapter to configure an IP

Check the network connection you can see an unrecognized network, configure this also with IP. Note that it needs to be in the same network segment as the IP configured on the OK3568-C development board:
Use the OK3568-C development board to ping the IP configured by the computer just now, and find that it can be pinged.
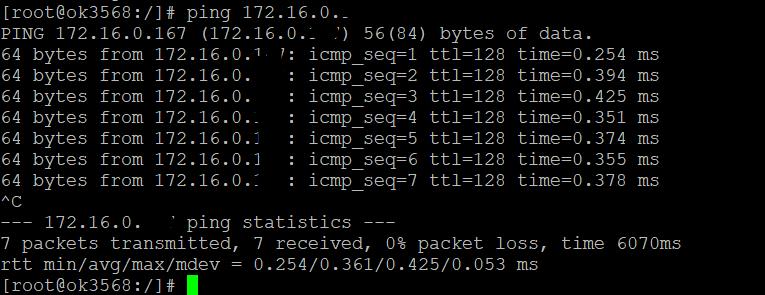
We can see that OK3568-C development board has realized USBNET function and network sharing.
Originally published at www.forlinx.net.
For example, when a mobile phone is plugged into a PC through a USB cable, the mobile phone is a USB Gadget. Similarly, in the article, the mobile phone is replaced by the OK3568-C development board.
The Gadget framework provides a set of standard APIs at the bottom layer,and the USB Device Controller (UDC) driver implements this set of APIs. Different UDC (usually part of the SoC) requires different drivers, and even different boards based on the same UDC need to modify the code. If we want to implement USBNET, we also need a driver, which is called RNDIS. The RNDIS driver is present in the kernel, you just need to find the configuration entry and compile it into the kernel.
First go to the source kernel directory and enter the menuconfig graphical configuration screen:
When entering menuconfig, you need to specify the environment.Otherwise the graphical configuration interface entered by executing make menuconfig directly is for the X86.
As shown in the figure below, the ARM architecture is the correct graphical configuration interface:
Press/to enter the search interface:
Directly search for rndis and find the directory with the word "USB Gadget". You can see that there are multiple paths. You can directly enter the USB Gadget directory to see that it is the option to configure RNDIS.
After searching, the final path is shown as follows:
Turn on the RNDIS driver and select some network protocol configurations, as shown in the circle below:
Find the USB Gadget precomposed configurations and compile RNDIS into the kernel (if you choose to compile it into a module, compiling the kernel alone will not generate a.ko file. In order to save the tedious mounting steps, this article compiles RNDIS into the kernel).
After the configuration is completed, press the Exit key to exit, and select yes for "Save or not":
Return to the source code directory to enter the build. Sh script, and comment out the defconfig command to generate the.config file, so that the menuconfig configuration takes effect. The comment location is as follows:
Save and exit, compile the kernel separately, and execute the./build. Sh kernel under the source code directory. After compilation, boot. IMG files are generated in the kernel directory.
Use RKDevTool, the burning tool provided by Rockchip, to update the image in a single step. Press and hold the Recovery key and press Reset until the programming tool displays that a LOADER device has been found and then release the Recovery key.
Replace the position in the figure, click the device partition table, and then click Execute. After the device restarts, the burning is completed, and there will be burning progress on the right side. After the development board restarts, ifconfig -a shows that the usb0 node is generated.
Some of the more interesting features can be achieved with the Linux USB Gadget device driver:
- 1. A certain storage device in an embedded product, or a certain partition of a storage device, can be recognized by a PC as a U disk;
- 2. After an embedded device is connected to the PC through USB, a new network connection will appear on the PC side. There will also be a network card device on the embedded device. You can configure their IP addresses and conduct network communication, commonly known as USBNET.
Force USB output to device
echo peripheral > /sys/devices/platform/fe8a0000.usb2-phy/otg_mode
The print information is shown as follows:
This node can be seen on the device manager network adapter to configure an IP
Check the network connection you can see an unrecognized network, configure this also with IP. Note that it needs to be in the same network segment as the IP configured on the OK3568-C development board:
Use the OK3568-C development board to ping the IP configured by the computer just now, and find that it can be pinged.
We can see that OK3568-C development board has realized USBNET function and network sharing.
Originally published at www.forlinx.net.